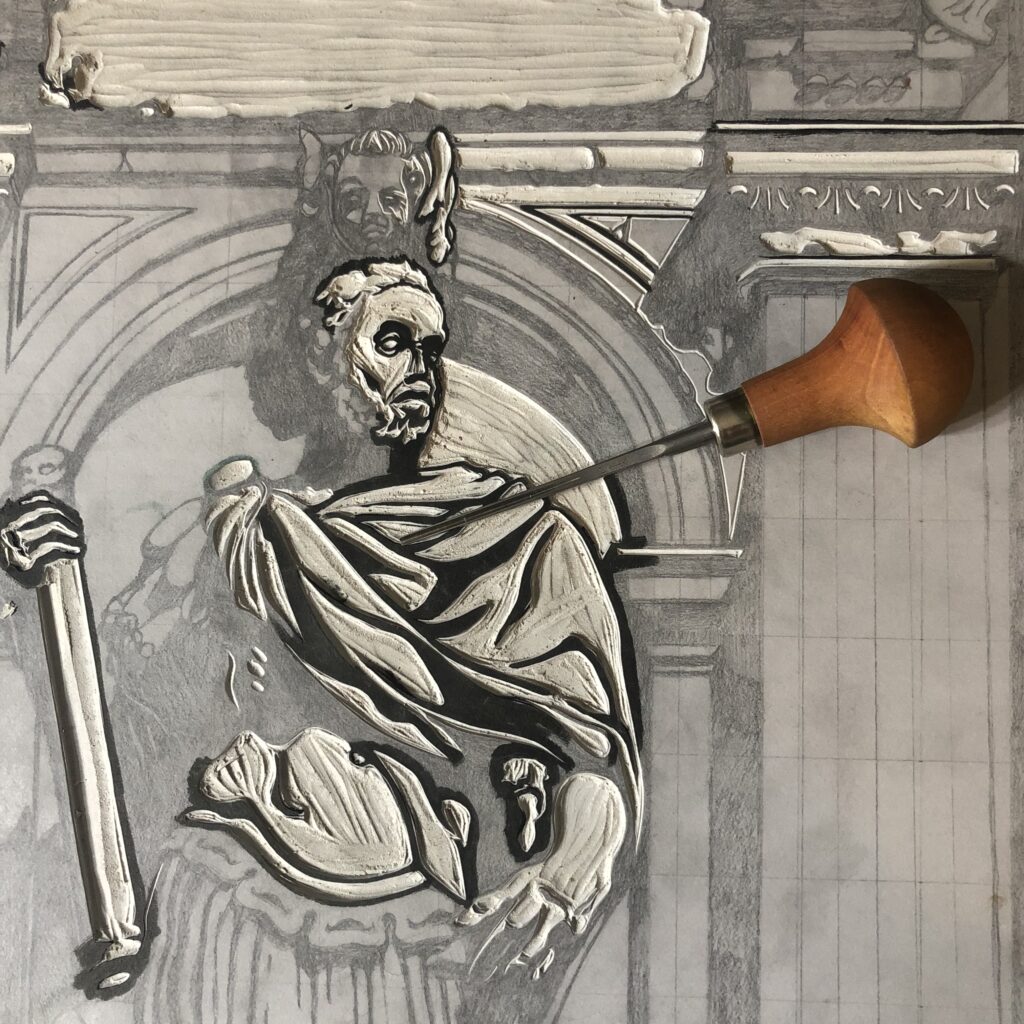
As Ive continued diving into linocut prints my current obsession has been with big bold black and white prints with intricate details. Also while going through print exchange portfolios in class Ive become more and more interested in blind embossing. I knew I wanted to find a way to combine the two so while clicking through folder after folder of reference photos Ive taken over the years I came across a photo id taken on a trip to Italy. It was of this large statue with two pillars and the angle I had taken the photo at gives it a kind of looming effect. I do a lot of my drawing and planning on my iPad now and it didnt take long for me to get a design drawn up fort his print. As i started the transfer process of getting the design onto the linoleum block i realized I’m planned a lot of thin lines in the print, it became the perfect excuse to buy myself a brand new carving tool, it arrived just as i was finishing the transfer. In the image below you can see the grid I used to transfer the image as well as the tool. WOODCRAFT Pfeil #11 1mm v-gouge. I wish I had gotten one of these sooner, its such an incredible tool. It fits so well in my hand and the long neck is perfect for the way i hold the tool and carve. I cant wait to grow my collection of these tools.
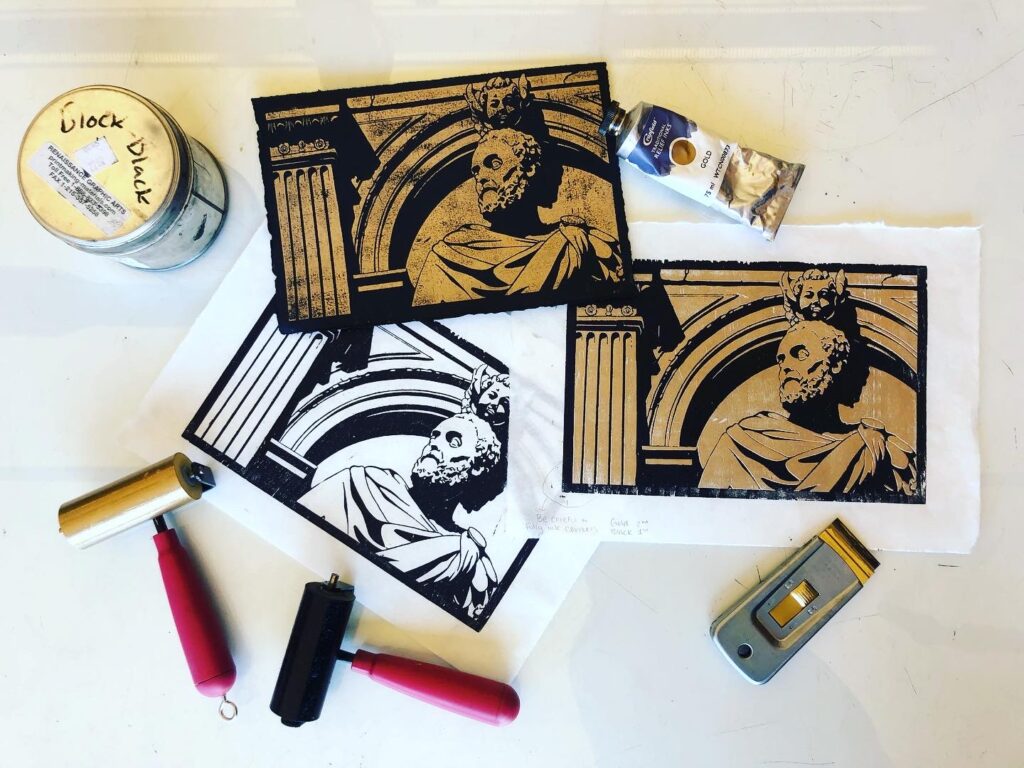
While I was carving this giant 18 x 12 inch print I got the opportunity to work with David Kenny and use the Laser etching machine we have on campus to make a print. I used a small piece of the design I was carving onto the big block, and let the machine do its work. Slowly the laser moves back and forth zapping away the parts of the design you want to get rid of. We etched two blocks, one that would print all the shadows and another that would print all the highlights so that they could be either combined to create a print or used individually, along with buying myself the carving tool I purchased Cranfield’s Gold relief ink and just like with the tool I am in love. It looks especially gorgeous on black Reeves BFK paper as it’s such a dark rich black. I think this is where the independent highlight block really shined, and working in a reverse fashion like this was a fun opportunity. It’s a technique I want to continue to work with. Below is the highlight block alone, The highlight and shadow blocks together, and then the shadow block alone.
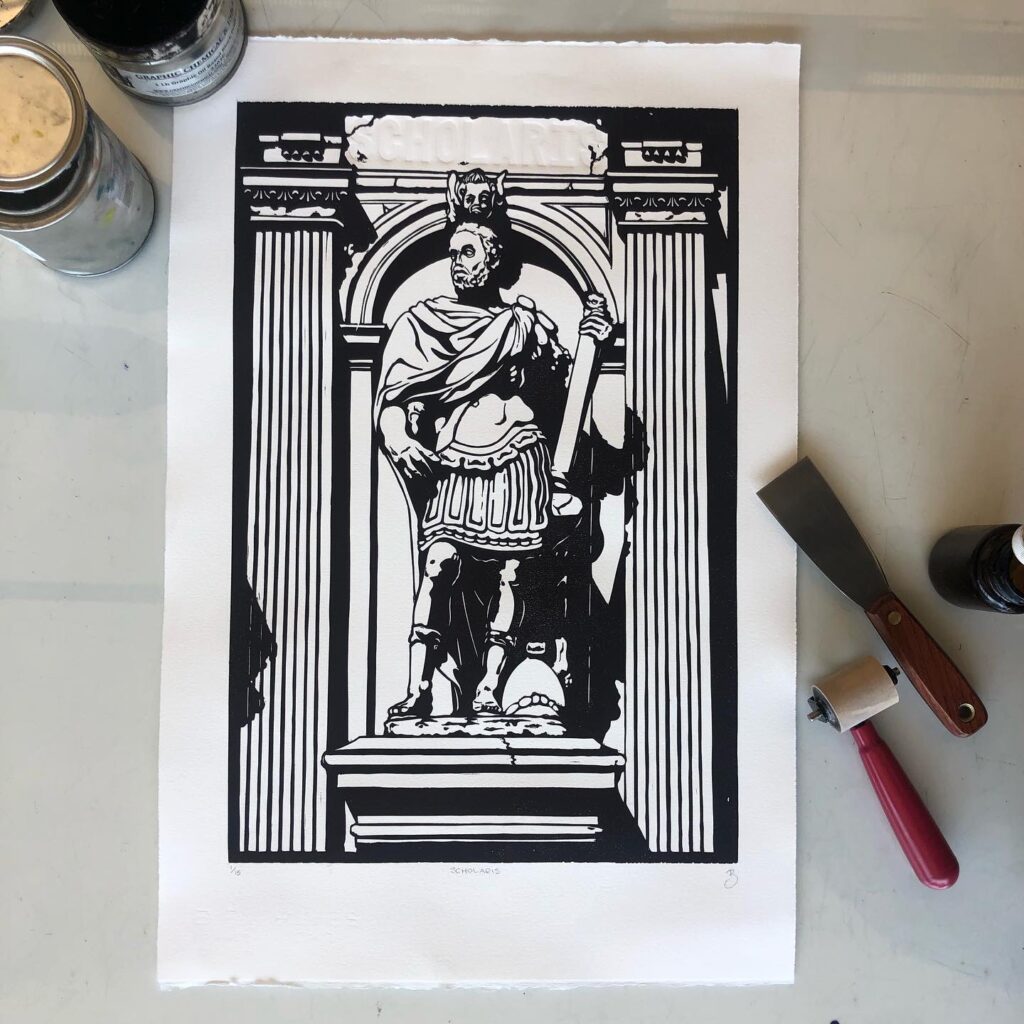
Working on this mini side print was a great motivator while carving the large block. Once it was finally carved I was very eager to get it printed and pulling that first proof was magical. I was really happy with where the print was headed and loved the thin lines I was able to get with the new tool. Once I knew the print was working I set out to work on the blind embossing aspect of the print. In my excitement I made a small hiccup. I measured the area i had to work with, the white area at the top of the print, and got roughly 1.5 x 6 inches. But when I went to design the embossing block I didnt shrink the letters at all, I made them fit snuggly into a box the exact measurements of the area available. I had already fully carved the embossing block when I realized my mistake, so instead of having to carve backwards letters all over again I decided to open up the white space at the top of the print to accommodate the larger embossing block. The print in the photo below is the two combined and I am so happy with the outcome. Ive printed it on Stonehenge paper and look forward to trying it with Reeves BFK, my hopes is that the thicker paper will allow me to get a deeper embossing to really pus the shadows the embossing creates.